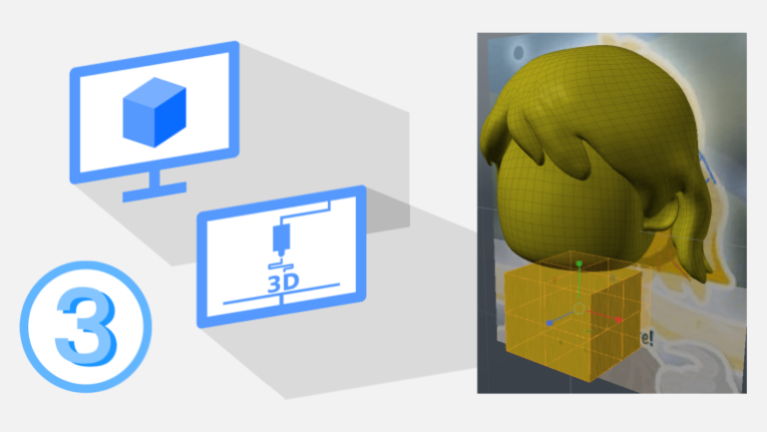
In the last two posts, we talked about how to model the head of our 3D character. Since the cartoon head does not have a flat base, this time will create an upper body as a stand for it. The head and body will be built into individual parts. We will design a joint to make them connectable at the neck. The skill is useful when we design movable parts. It can be also applied to divide oversized objects into small and assemblable pieces. Thus, in this post, we will finish our model by modifying the head and adding a body to it.
Furthermore, we’re going to make our 3D character into a real figure. Thus, we will export our resulted 3D object as .obj or .stl files. The output should be a manifold mesh if we manipulated the polygons appropriately. Otherwise, it will not produce the expected structure during 3D printing. To prevent this, running mesh inspection and repairing is a good idea to remove invalid geometries from 3D files. netfabb, which is one of the best free STL repair tools. I used it to verify whether the 3D files were printable.
List of the previous posts in this tutorial series:
#1 Model from Scratch with 3D sculpting and polygon tools
#2 Convert hair to a solid object and merge it with head
⬢ Model a hole for neck connector
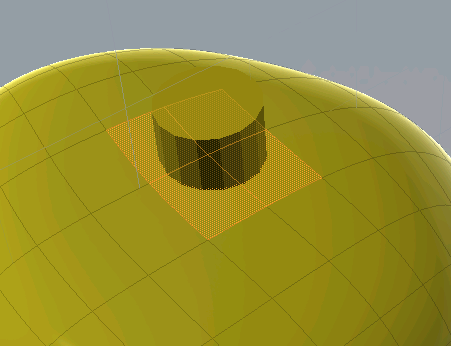
Move and scale a cylinder to the bottom center of the Head object and overlap each other
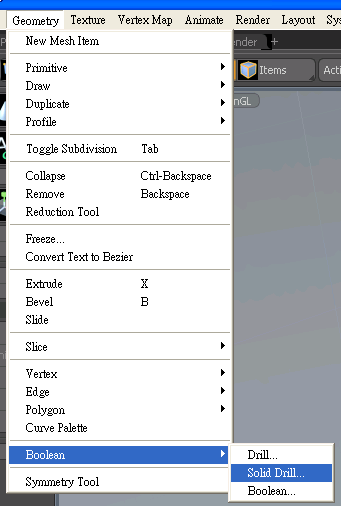
In the main menu, choose Geometry > Boolean > Solid Drill…
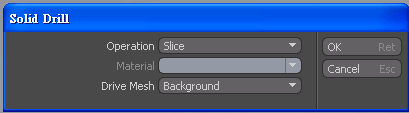
Select Slice operation and Background as the drive Mesh
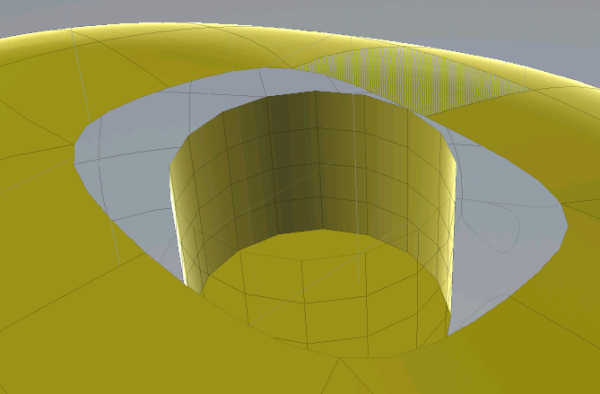
Delete the polygons surrounding the hole
Based on your joint design, scale the cylindrical mesh to change its diameter
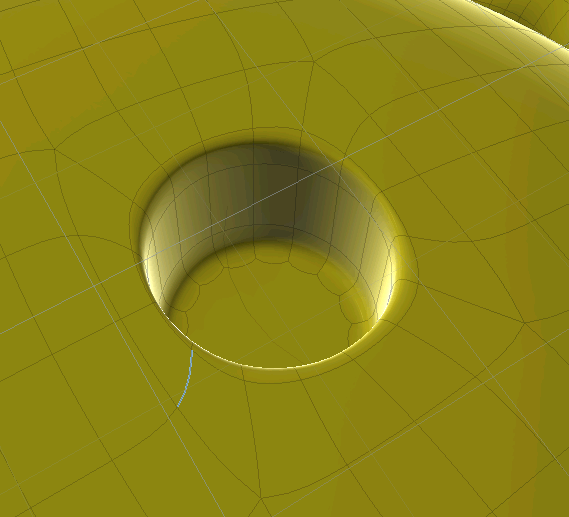
Bridge the gap to rebuild a smooth surface
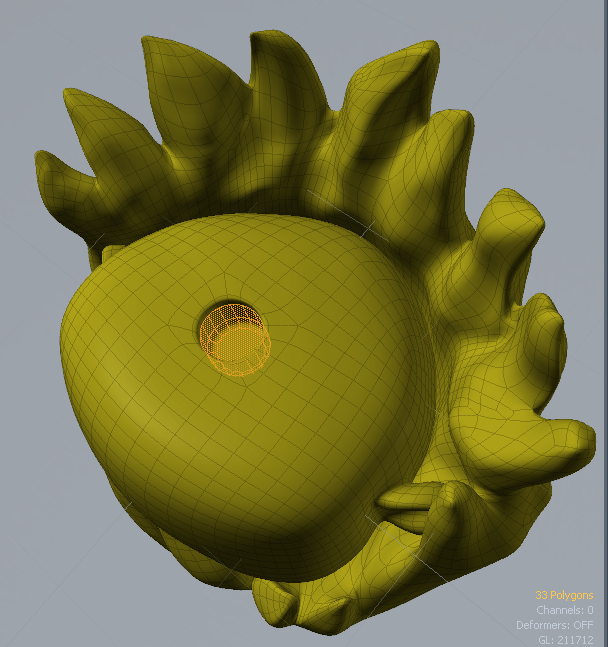
⬢ Model a body part / base stand
Based on the hole at the bottom of the head object., add a cylinder along the hole axis and scale it to have a similar diameter
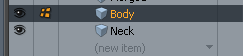
Name the cylinder as Neck and then create a box under the head object as Body
Adjust the size and position of the box
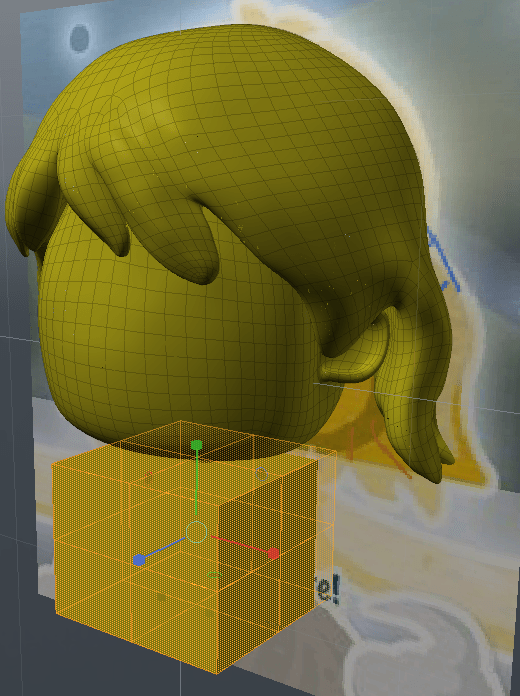
Isolate the two new objects by hiding the head object
Gradually create the curvature of the upper body using the Scale tool
Extrude the base to increase the number of mesh segments available to profiling the shape
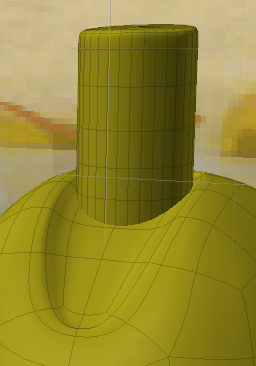
Slightly indent the area near the neck region to produce a neckline
⬢ Inspect exported 3D objects with netfabb
In the following demonstration, we will be using netfabb Basic, a free software that provides mesh editing, repair, and analysis features designed for 3D printing. Despite netfabb being acquired by AutoDesk in 2015 and becoming part of their paid products, you can still find unofficial archives of the old netfabb Basic version on GitHub for download.

netfabb-basic-download (this link opens in a new window) by 3DprintFIT (this link opens in a new window)
Unofficial Netfabb Basic and/or Netfabb Free download archive
The version 7 user manual is also available online. You can click on the View PDF file button below to download the copy available on DOCPLAYER.
For Windows, download netfabb-free_7.4.0_win32.zip file. Then, unzip the file and run netfabb.exe to open the program.
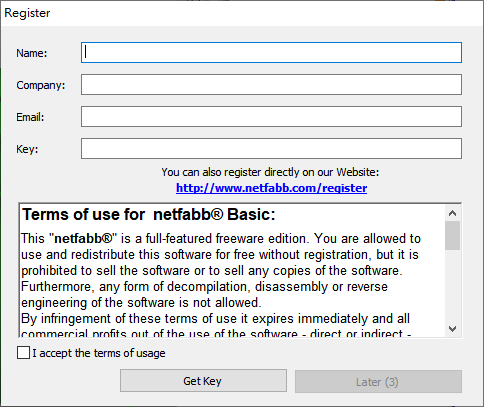
It will popup a Register dialog. Wait for 10 seconds, check I accept the terms of usage and then click on the Later button to launch the free version.
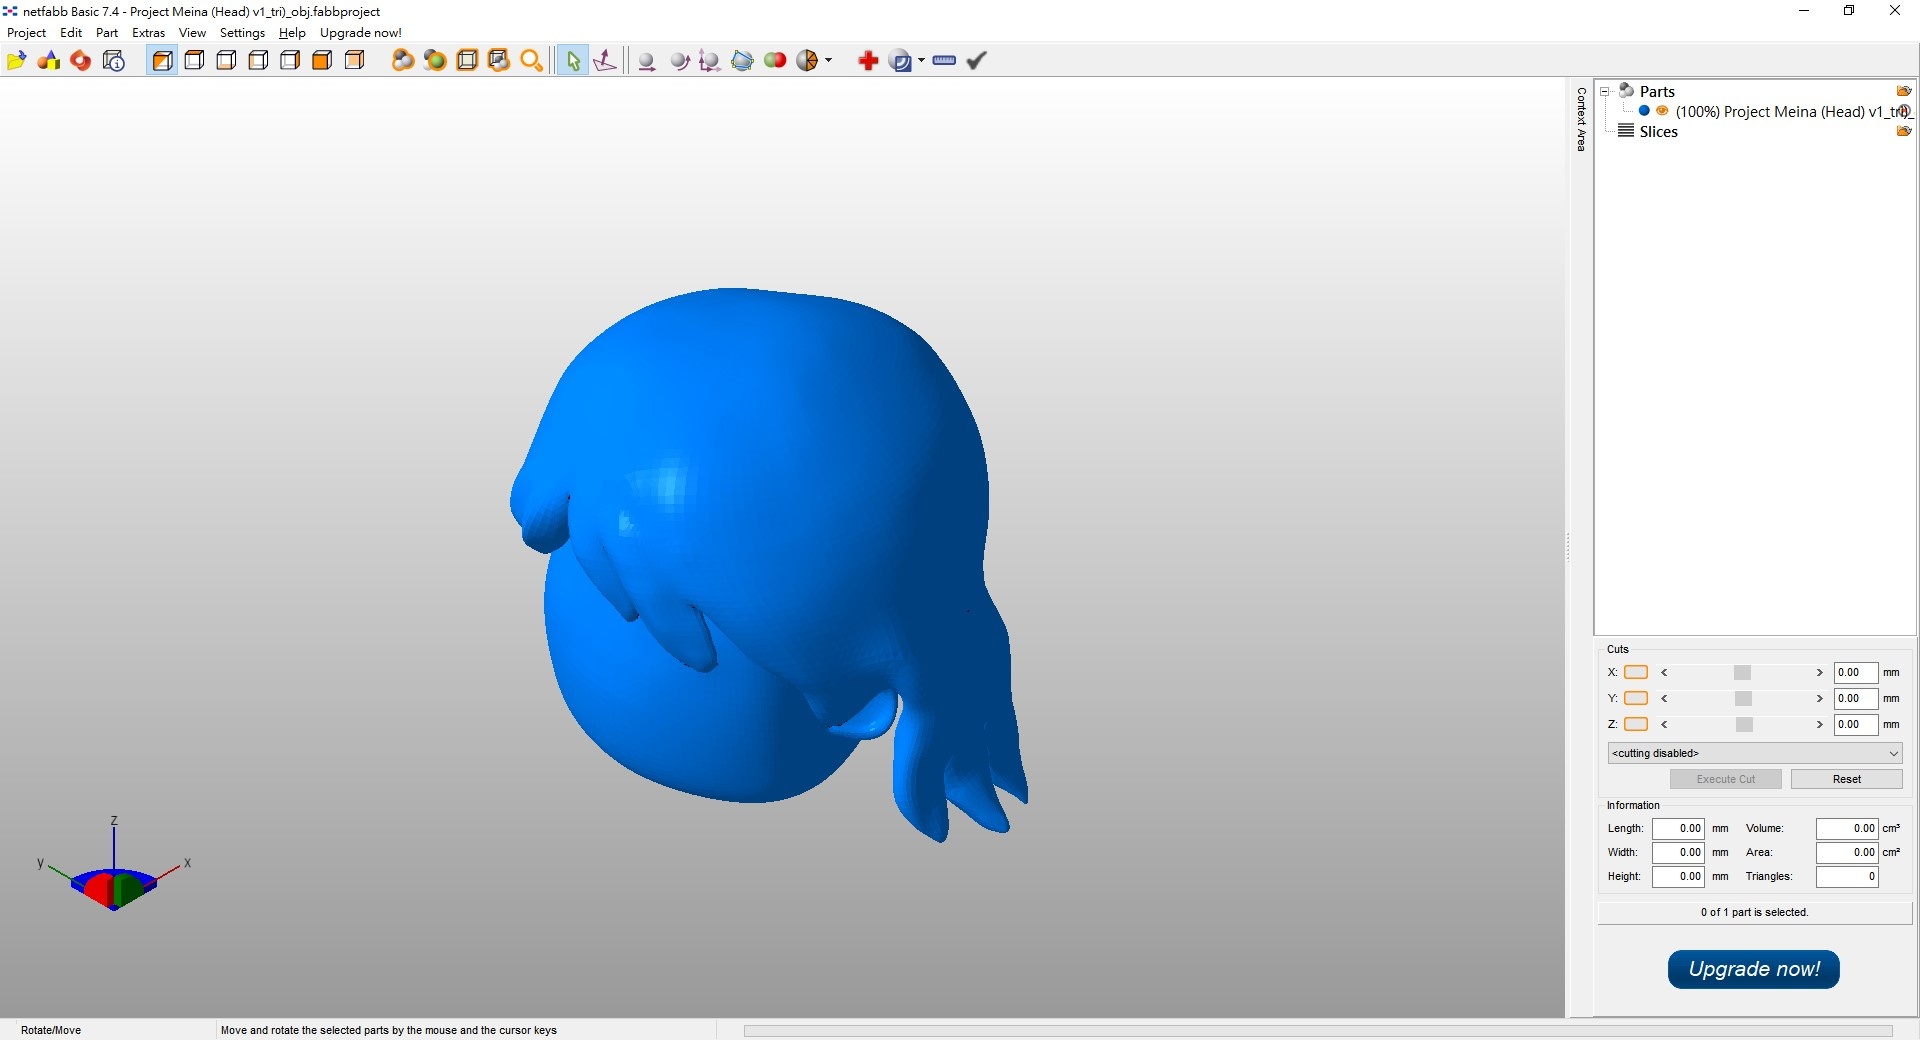
In the main menu, choose Project > Add Part (or drag and drop) to import model files, such as .obj/.stl file.

If a caution sign displays in the bottom right of the screen, it indicates that the imported part is damaged. Therefore, the file cannot be used for 3D printing.
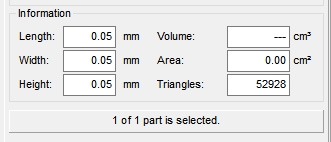
Many 3D file formats are unitless. It is important to check the dimensions of the imported part in the right pane. For instance, the image below shows that the part was in 0.05 mm only, which is an unreasonable size for normal 3D printing.
In the main menu, choose Part > Scale.
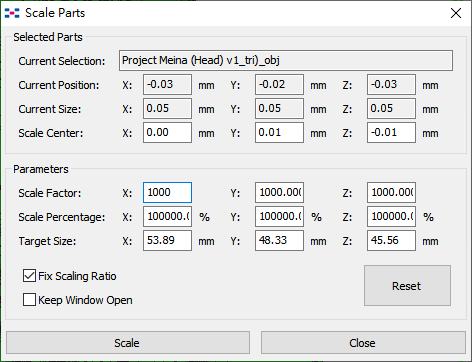
Change the values to scale the parts to your target size, then click Scale.
Next, click the Repair icon to enter the repair mode.
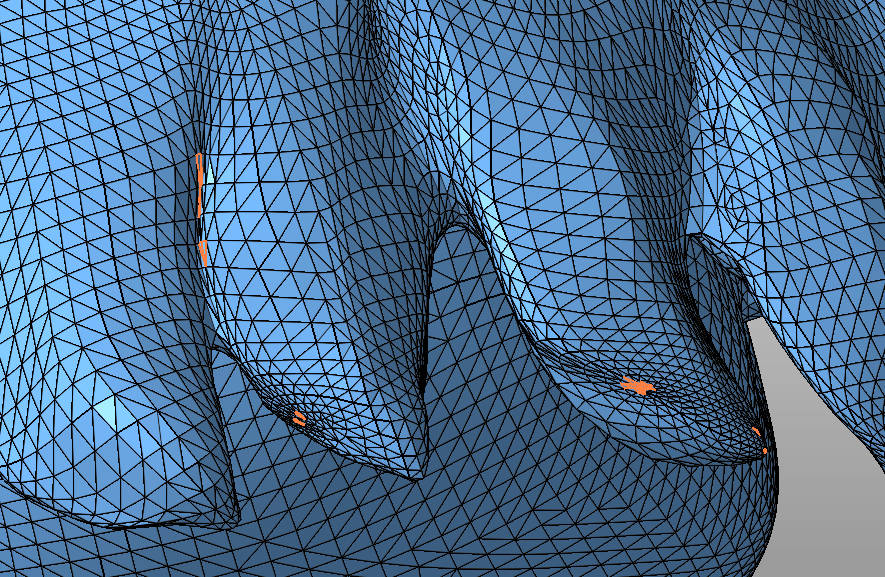
In the repair screen, there may be some triangles marked orange, which represents degenerate faces. According to the netfabb manual,
Degenerate faces in a file principally do not result in bad parts when manufactured, but they may dramatically increase the number of corner points and hatches in the slice files necessary for the production. This may cause a much longer
calculation and production times.
Therefore, don’t worry about that. Go ahead and click on the Automatic Repair button in the right pane to repair the parts.
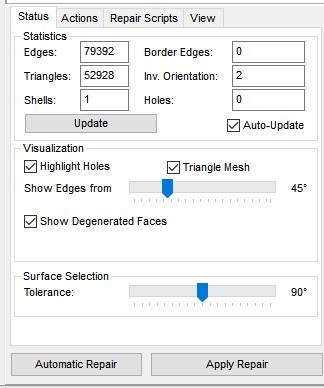
In the Automatic Repair dialog, select Default Repair and click Execute.
Click Apply Repair to save and exit the repair mode.
The caution sign disappears if the parts were successfully repaired.
Click New Analysis > Standard Analysis next to the Repair icon
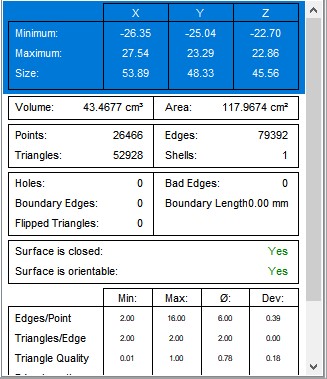
The analysis will summarize the part features to a table. Check whether the repaired model has zero holes, zero boundary edges, zero flipped triangles. Also, ensure the surface is closed and orientable.
After repairing the 3D model, export the part from netfabb so that we go back to our 3D modeling software to further modify it.
To export the repaired item, select it under the Parts tree in the right pane. Then, right-click on the item, choose Export Part, and a compatible file format for your software.
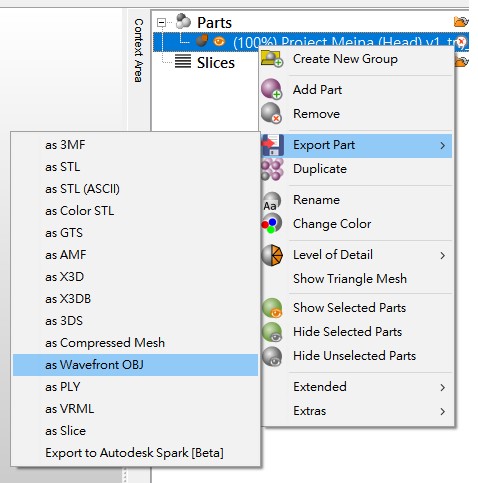
※ For Modo, we can export parts as Wavefront OBJ format.
Related: Printing Test of our 3D Cartoon Character with Ultimaker Original in 2012
Using the netfabb Basic, you can verify your model is robust for 3D printing. It is useful when we are going to 3D print a rich-feature model. The Automatic Repair feature provides a quick fix for damaged mesh objects.
If you enjoy this post, please share it on Facebook and Twitter. You might also support us by making a donation through Ko-fi.