WordPress is the most popular content management system (CMS) worldwide and is widely used in website development. Traditionally, it was necessary to rent or set up a LAMP web server to run WordPress. However, with the rise of containerization technology, the emergence of Docker has provided a more convenient and flexible way to deploy WordPress, allowing us to easily build and play with a local development environment for WordPress on our home computer.
Advantages of Docker:
Docker provides an isolated development environment that allows us to develop and test without affecting the host system. This means we can create a clean and secure sandbox without worrying about potential damage to the host system. Meanwhile, it effectively avoids version conflicts and dependency issues that may arise between different development projects, greatly improving development efficiency.
Using Docker Compose, a tool for defining and running a service stack, developers can quickly set up a WordPress website by defining containers for WordPress and SQL databases through a simple configuration file. By deploying through Docker, we can have fine control over the WordPress development environment, allowing us to start from basic configurations and delve into the core operation of WordPress.
Next, let’s take a look at the step-by-step guide!
Prerequisites
- For macOS or Linux:
- Windows 10 or 11:
Configuring WordPress using Docker Compose
Configuration: Defining containers and services with a docker-compose.yml file
First, make a new folder for the project and then create a file named docker-compose.yml in the folder. Next, open the file for editing using a text editor, such as Visual Studio Code. Specify the configuration for the WordPress and SQL database containers in YAML format, as shown below:
version: '3.9'
services:
  wordpress:
    image: 'wordpress:latest'  # Use the latest WordPress image
    depends_on:
      - "db"  # Ensures that the db service is started before WordPress
    env_file: .env  # Load environment variables from an external file
    environment:
      WORDPRESS_DB_HOST: db  # Database host, uses the service name 'db'
      WORDPRESS_DB_NAME: '${MYSQL_DATABASE}'  # Database name, loaded from environment
      WORDPRESS_DB_USER: '${MYSQL_USER}'  # Database user, loaded from environment
      WORDPRESS_DB_PASSWORD: '${MYSQL_PASSWORD}'  # Database password, loaded from environment
    ports:
      - "80:80"  # Map port 80 in the container to port 80 on the host
    restart: unless-stopped  # Restart policy to handle crashes
    user: '33:33'  # Run as 'www-data' user group
    volumes:
      - 'wordpress:/var/www/html'  # Persistent storage for WordPress files
    networks:
      - wordpressnet  # Connect to the 'wordpressnet' network

  db:
    image: 'mariadb:11.4'  # Use MariaDB version 11.4
    command: '--max_allowed_packet=67108864'  # Increase max allowed packet size for large queries
    env_file: .env  # Load environment variables from an external file
    environment:
      MYSQL_DATABASE: '${MYSQL_DATABASE}'  # Database name
      MYSQL_USER: '${MYSQL_USER}'  # Database user
      MYSQL_PASSWORD: '${MYSQL_PASSWORD}'  # Database password
      MYSQL_RANDOM_ROOT_PASSWORD: '1'  # Enable random root password for security
      MARIADB_AUTO_UPGRADE: '1'  # Enable automatic MariaDB upgrades
      TZ: 'Etc/GMT+8'  # Set the time zone
    restart: unless-stopped  # Restart policy to handle crashes
    volumes:
      - 'db:/var/lib/mysql'  # Persistent storage for MariaDB files
    networks:
      - wordpressnet  # Connect to the 'wordpressnet' network

volumes:
  wordpress: null  # Define the 'wordpress' volume
  db: null  # Define the 'db' volume

networks:
  wordpressnet:
    driver: bridge  # Use the bridge driver for the 'wordpressnet' network
Copy the above configuration into the Docker Compose file.
Choice of database system: MySQL vs MariaDB
Newbies often hesitate between MySQL or MariaDB as the database system when setting up a WordPress development environment. While many WordPress hosting services still use MySQL 5.x, that doesn’t mean we need to do the same in our local development environment. In fact, MariaDB is a better choice for resource-constrained laptops.
MariaDB is a community-developed fork of MySQL. It is not only fully compatible with MySQL’s commands but also incorporates many innovations and optimizations. Although starting from MariaDB 10, it has taken a slightly different development direction, it still maintains a high level of compatibility with MySQL 5.7 and earlier versions, and has advantages in many aspects.
The benefits of MariaDB include:
– Improved performance: Thanks to an optimized query processing engine and enhanced concurrency control, MariaDB is able to handle large volumes of data and user requests more efficiently. This means that using MariaDB can significantly improve the response speed and page rendering efficiency of the WordPress backend, reducing waiting times during development and the number of crashes due to insufficient resources.
– Security hardening: MariaDB has introduced numerous security features and patches, effectively preventing traditional SQL injection attacks and covering a wider range of data security threat response strategies. This means that our WordPress website data security will be more secure.
So, when deploying WordPress using Docker, consider migrating the old MySQL 5.x database to the MariaDB system.
Environment Variables: Configuring database name, user, and password using a .env file
The database name, user, and password for WordPress and MariaDB (MySQL) services are defined by the following variables, respectively:
WORDPRESS_DB_NAME: The name of the database that WordPress will connect to.WORDPRESS_DB_USER: The username that WordPress uses to connect to the database.WORDPRESS_DB_PASSWORD: The password for the database user.MYSQL_DATABASE: must be the same value asWORDPRESS_DB_NAME.MYSQL_USER: must be the same value asWORDPRESS_DB_USER.MYSQL_PASSWORD: must be the same value asWORDPRESS_DB_PASSWORD.
You can also modify these values directly in the Docker Compose file. However, here we will use the .env file, referencing environment variables from this external file.
Create a file named .env in the project folder. Then, customize your variables with the following example:
MYSQL_DATABASE=wordpress_db
MYSQL_USER=wordpress_user
MYSQL_PASSWORD=secure_password

# Optional: You can also define other environment variables here if needed.
Make sure to replace wordpress_db , wordpress_user , and secure_password with your preferred database name, user, and password.
💡 Tips:
- This
.envfile should be placed in the same directory as thedocker-compose.ymlfile, or specify a different path in the Docker Compose file. - By the way, the
.envfile contains sensitive data like passwords. If you’re using Git to manage your project, you can include.envin your.gitignorefile to prevent it from being tracked by Git and committing sensitive information to version control.
Running WordPress website using the docker compose up command
Now you have the blueprint for implementing WordPress using Docker. So, let’s begin construction!
To start the application, run the following command in the terminal:
docker compose upOn the first run, Docker will download the required image from Docker Hub, which may take a while. Once downloaded, Docker will initialize a new website by copying the WordPress core files and setting up the SQL database in the specified persistent storage.
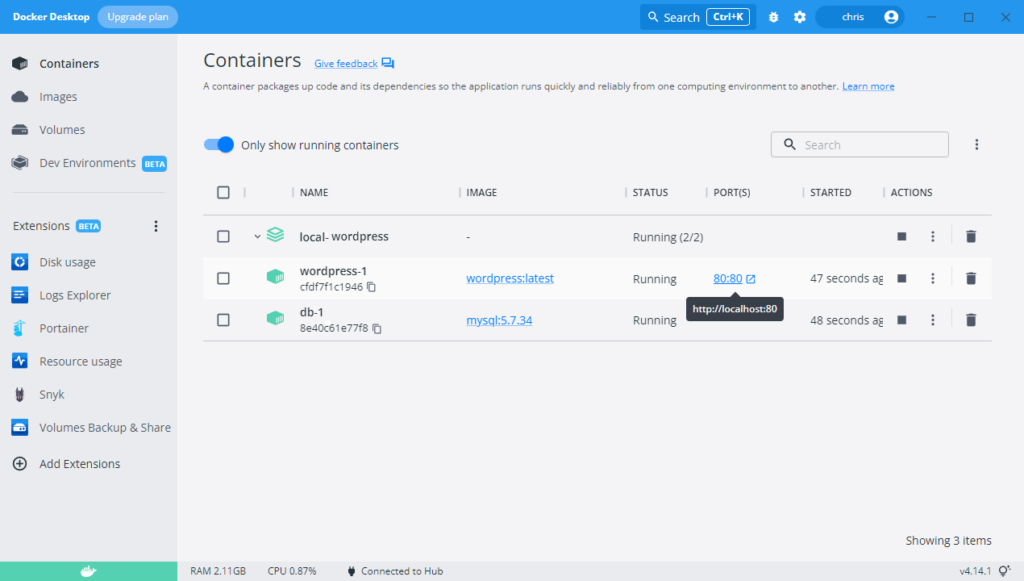
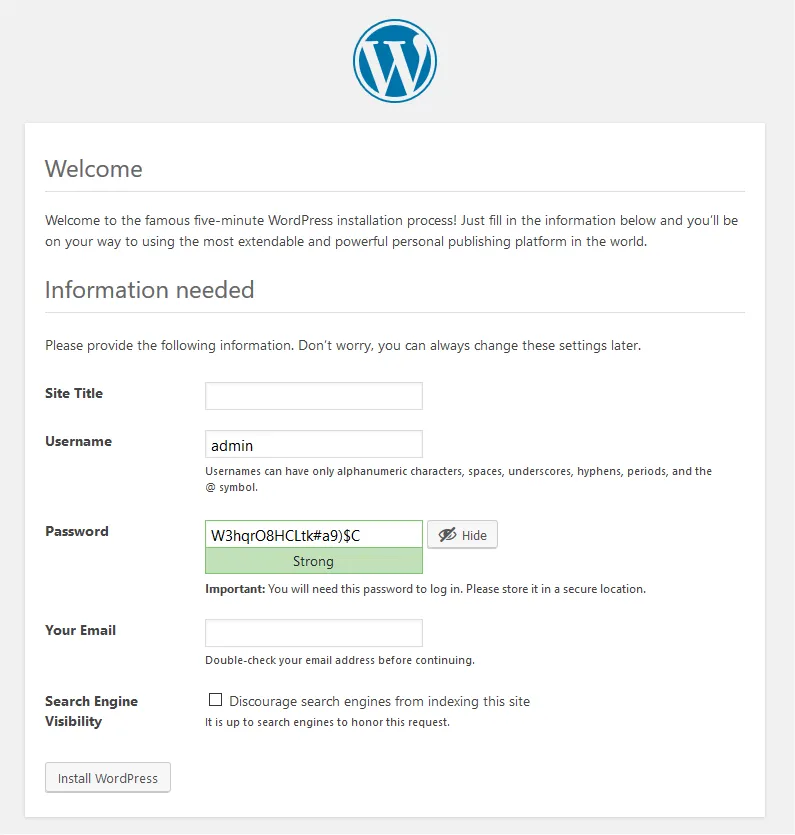
local-wordpress stack on Docker DesktopOnce the container is ready, you can access your WordPress website by visiting http://localhost in your browser.
When you no longer need WordPress, you can stop (or delete) the containers by running the following commands in the terminal:
# Stop the containers
docker compose stop

# Or, stop and delete the containers
docker compose downNotes: The WordPress files and database files are stored in Docker volumes, which means they won’t be destroyed after deleting the containers. You can recreate the containers later, and your data will remain intact.
Supplementary Notes
#1 – Configuring PHP environment for WordPress
In the upcoming tutorial articles, we will use the WP2Static plugin to output a static website. To ensure the plugin works properly, we have to modify the PHP settings inside the WordPress container to meet its system requirements.
Create a file named wordpress.ini in the project folder and copy the following settings to the file:
file_uploads = On
memory_limit = 256M
upload_max_filesize = 64M
post_max_size = 64M
max_execution_time = 3000
max_input_time = 1000
Then, in the Docker Compose file, add the following configuration to the volumes variable of the WordPress service for mounting the wordpress.ini file:
    volumes:
      - 'wordpress:/var/www/html'  # Persistent storage for WordPress files
      - type: bind
        source: ./wordpress.ini
        target: /usr/local/etc/php/conf.d/wordpress.ini
consistency: cached # Bind mount for custom PHP configurationNote: In the binding mount settings, the consistency: cached option is primarily to improve the read performance and reduce the latency when the container reads the wordpress.ini file from the host filesystem.
Save the changes, and run the following command to restart the containers:
docker compose restartThis will allow the PHP process access to more resources, memory and execution time, which will be especially important for the static processing of large WordPress websites.
#2 – Changing WordPress to listen on a port other than 80
By default, WordPress containers will be served on port 80. If the port is already occupied on your host machine, you can modify the Port Mapping to access the container on a different port. For example, define the ports variable as '8080:80' to access the website at http://localhost:8080 instead.
Unfortunately, the WP2Static plugin does not support this type of network configuration. We need to take an extra step to tweak the Apache server in the WordPress container so that both ends use the same port. Prepare the following two configuration files to override the default configuration in the container:
- File:
ports.conf
Listen 8080

<IfModule ssl_module>
	Listen 443
</IfModule>

<IfModule mod_gnutls.c>
	Listen 443
</IfModule>- File:
000-default.conf
<VirtualHost *:8080>

	ServerAdmin webmaster@localhost
	DocumentRoot /var/www/html

	ErrorLog ${APACHE_LOG_DIR}/error.log
	CustomLog ${APACHE_LOG_DIR}/access.log combined

</VirtualHost>
Then, in the Docker Compose file, modify the ports and volumes variables of the WordPress service:
    ports:
- '8080:8080' # Map port 8080 in the container to port 8080 on the host volumes:
- 'wordpress:/var/www/html' # Persistent storage for WordPress files
- type: bind
source: ./ports.conf
target: /etc/apache2/ports.conf
consistency: cached # Bind mount for Apache ports configuration
- type: bind
source: ./000-default.conf
target: /etc/apache2/sites-available/000-default.conf
consistency: cached # Bind mount for Apache site configurationAfter the update, restart the containers:
docker compose restartThis will ensure the host and the WordPress service are connected through the same port, eliminating any related network issues.
Summary
Docker has brought revolutionary changes to the deployment and development of WordPress, making website building faster, more secure, and more flexible. This not only allows the system to be deployed and run efficiently, but also helps in troubleshooting, effectively avoiding the confusion and uncertainty that can arise from overly complex systems.
In addition to the above solutions, developers can also selectively integrate WP-CLI, Nginx, and phpMyAdmin, or enable advanced configurations such as HTTPS SSL/TLS certificates based on project requirements, expanding the functionality of the entire system. Using Docker not only provides convenience for current development, but also offers high flexibility for the long-term development of WordPress websites. Whether you’re a novice in website development or a seasoned expert, Docker is worth delving into and mastering.
📣 Continue Reading: To learn how to migrate an existing WordPress site to a local environment, please refer to our next article: Free WordPress Migration Tool – WPvivid Backup & Migration Plugin.
Learn More
About running WordPress on a local computer:
- What Are The Advantage Of Local WordPress Hosting? | seowings.org
- Installing WordPress on your own Computer | WordPress.org Forums
- Top 10 Best Localhost Testing Environments for WordPress | seowings.org
- Building a local WordPress test environment using Windows 10, Docker Desktop, and WSL 2 | Jussi Roine
- Using Docker Containers With WordPress | WP Engine®
- How to Setup a new WordPress Project with Docker | Medium
- Create your first PHP/MySQL application in docker | by Adnan Siddiqi | FAUN Publication (medium.com)
About add-ons for WordPress stacks:
- Nginx vs Apache: Best Web Server for WordPress? | WP Engine®
- How to Manage a WordPress Database with phpMyAdmin | GreenGeeks
If you enjoy this post, please share it on Facebook and Twitter. You might also support us by making a donation through Ko-fi.